Best Vehicle Mounting Locations for Starlink Mini
I’ve tested and reviewed lots of Starlink mounts. Learn the best methods and spots to install Starlink Mini on your car, truck, van, or RV.

With the Starlink Mini, getting internet in a vehicle has never been easier. The versatile little antenna provides high-speed internet just about anywhere in the world, even while driving. Whether you have a car, truck, van, or RV, there are a variety of vehicle mounts you can use to get the best performance and reliability.
I’ve tested and reviewed lots of Starlink products over the years, including my full Starlink Mini review. I like to bring my Mini on every road trip so that I can stay connected outside of cell phone range. I usually mount Starlink on top of my car using a magnetic mount, but I’ve also installed the antenna inside, suctioned to my glass roof.
Best Places to Install Starlink On a Vehicle
Starlink Mini works great mounted inside or outside a vehicle, so there are a ton of good locations to pick from. In my experience, here are the best places to mount a Starlink Mini:
- On top of the roof
- Underneath a glass roof
- On the dashboard pointed out the windshield
- Underneath the rear window or hatch
There are mounts you can buy to fit every situation and location. In this guide, I’ll explain the various types of vehicle mounts for Starlink Mini, as well as provide recommendations based on my experience using Starlink in motion.
This post may contain affiliate links. See our policy to learn more.
Mounting Starlink On a Vehicle Roof
The first and obvious choice for where to mount your Starlink Mini is the roof of the vehicle. What better mounting location than the roof, where Starlink will have an unobstructed view while you are driving? You can mount the Mini to just about any roof material, from fiberglass RV roofs to the all glass roofs found in many modern cars.
Magnetic Roof Mounts
NovaKits Magnetic Mount for Starlink Mini | #CommissionsEarned
If you have a metal roof, my recommendation is a magnetic mount. I use one on top of my Toyota RAV4. It’s my preferred mounting method and location because of how easy and secure it is. There is no drilling or permanent installation. Magnetic mounts just stick to any metal on a vehicle, like the roof, hood, or trunk.
Magnetic mounts designed for Starlink Mini usually have four rubber coated magnetic feet. They stick to the metal roof with enough force to keep it secure, even at highway speeds.
Suction Mounts

For glass or other non-magnetic roofs, consider using a suction mount. They usually feature four powerful suction cups that hold the Mini in place while driving. You can stick them to metal or glass roofs.
Like magnetic mounts, suction mounts don’t require drilling holes in your vehicle. They are easy to install and remove, making them a great option for both temporary and permanent setups on all cars, trucks, vans, or RV’s.
Although I haven’t used a suction mount on top of my roof, many of the magnetic mounts I’ve tried have suction cup attachments. For example, the Veritas Vans Starlink Mini Mount pictured above gives you the option of magnets or suction cups when you order.
Roof Rack Mounts

A roof rack is a great spot to mount Starlink Mini. Roof rack mounts provide a semi-permanent installation compared to the more temporary magnetic and suction mounts. Fastening the mount to your roof rack allows for a secure installation that won’t go anywhere, while still being easy to remove.
I recommend the Mini Roof Rack Mount offered by Starlink. It’s cheaper than many aftermarket options while offering higher build quality and better materials. If the OEM Starlink roof rack mount isn’t available in your country, consider this Amazon alternative.
Permanent Roof Mounts

For the most secure Starlink Mini installation you will need to drill some holes. Starlink sells an accessory called the Mini Mobility Mount for permanent roof installations. This type of roof mount is what I recommend for van and RV owners who don’t need to remove Starlink very often.
Although permanent roof mounts require a bit more work to install, the result is a clean and rock solid installation. You won’t have to worry about anyone walking away with your Starlink or your Mini flying off while driving down the highway.
Mounting Starlink Inside a Vehicle
Did you know that Starlink signals can pass through most types of glass? I used to own a Tesla Model Y, which has a huge glass roof. Although I could have used a suction mount on the exterior of the vehicle, I found it much easier to mount my Starlink Mini inside, pointing upward out of the large glass roof.
Suction Mount Under Glass
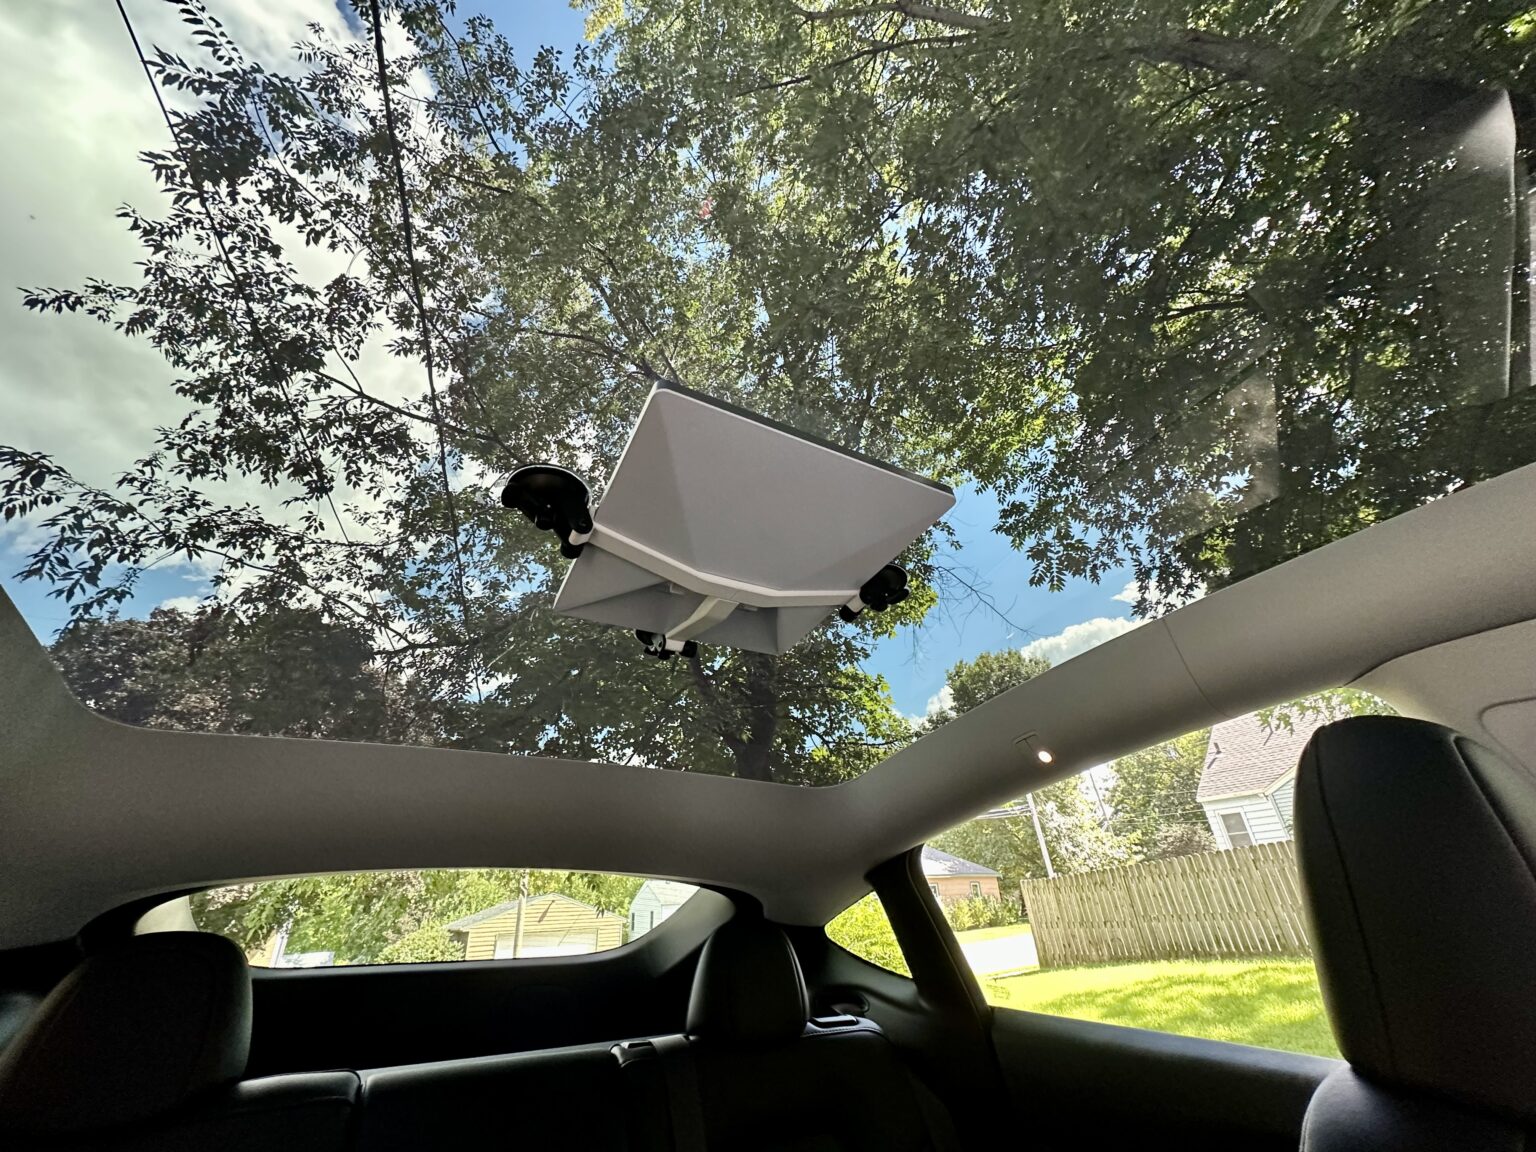
I think the biggest advantage of mounting Starlink under a glass roof or moonroof is the protection it gets from the outside world. You don’t have to worry about rock chips, hail damage, or theft. It’s also easier to route the power cable since you don’t have to pass it through a door or window like you do with external mounts.
I did a whole YouTube video on my setup and how it performed. In short, glass roofs don’t seem to impact performance or reliability at all.
There are tons of aftermarket suction mounts for Starlink Mini. I used one from ContronX in my Model Y which I highly recommend. I’ve used the ones with two separate pieces and I don’t like those at all. I prefer one-piece designs with at least three suction cups.
Dashboard/Windshield Mount
![Starlink Mini Car Mount for Dashboard, cuarko Starlink Mini Mounting Kit, [Sticky Suction Base, Angle-Adjustable, Secure Hold] Car Suction Cup Mount Ensures Stable Setup While Driving](https://m.media-amazon.com/images/I/41ekhFv0oUL.jpg)
Cuarko Starlink Mini Car Mount | #CommissionsEarned
Say you want to install Starlink Mini inside your vehicle but you don’t have a glass roof. One of the more interesting vehicle mounting locations is on the dashboard with the Mini pointing up through the windshield. The same concept can be applied to the rear window or hatch area of a vehicle.
This is the easiest and cheapest vehicle mounting method for Starlink Mini. If you don’t mind your antenna sliding around a bit, you don’t need any mounting accessories at all. Just use the Mini’s included kickstand and place it on your dashboard. For a more secure dashboard mount, several aftermarket companies offer adhesive and suction mounts designed to keep Starlink Mini in place.
Cable Routing and Power
One of the most common questions I get about using the Starlink Mini on a vehicle is how to run the cable without drilling holes. If you are mounting Starlink inside your vehicle this isn’t a concern since you should have easy access to a 12V outlet. But for external mounts, you can:
- Pass the cable through a door or window
- Use an existing cable pass-through
- Drill a new hole just for Starlink
I highly recommend the easiest option, which is just run the cable through a door or window. On my Toyota RAV4, I just run the cable through the rear hatch opening. There is a 12V outlet in the back hatch area. The thick rubber seals surrounding the hatch opening protect the cable from damage. The hatch can close completely without pinching the Mini’s power cable.
For power I like to use the 12V outlet that most vehicles have. I bought the Starlink car adapter accessory that comes with the cigarette lighter adapter plus a 15′ power cable. Be sure to check out my full Starlink Mini 12V Car Adapter Review to learn more.
Aligning Starlink On a Vehicle
You don’t need to aim or align Starlink Mini when it’s mounted on a vehicle. It’s simply not practical, especially when you are using Starlink while driving. Even if you park your RV for the night, it’s not necessary to aim the vehicle a certain way to get a good signal.
All Starlink antennas have a wide field of view, around 110 degrees. That means it can see most of the sky when you have it pointed straight up. Some vehicle mounts angle the antenna slightly, but that won’t be an issue. If your mount puts the Mini at an angle, the antenna should face forward on the vehicle to minimize wind resistance while driving.
Final Thoughts
Although there are several places you can mount the Mini on a vehicle, my recommendation is using a magnetic mount on the roof. The roof provides unobstructed views of the sky and plenty of places to put Starlink. If the roof isn’t an option, you can also place the Mini on your dashboard or under your rear window.
I hope this guide has helped you pick a vehicle mount for your Starlink. If you have any additional questions or concerns I’d love to help you out. Just leave me a comment below!
So I have a Kia soul. So you’re saying I can mount that on my back window even though it’s facing out.
i am on the verge of jumping into the Starlink Mini world – your articles are both practical and informative so i now think that today is the day! I will also buy a suction mount, a 12v connector and a USB-C connector