Worst Starlink Accessory – Gen 3 Pipe Adapter Review
In this post, I review Starlink’s worst accessory ever, the Gen 3 Standard Pipe Adapter. Find out why it’s so bad, and what you should buy instead.
Starlink’s Gen 3 Pipe Adapter accessory should have be pretty straightforward. After all, they produced the successful Gen 2 Pipe Adapter for years. Don’t fix something that isn’t broken, right? Unfortunately, the latest version of the Pipe Adapter may be the worst Starlink accessory ever.
In this post, I will show you how I installed the Gen 3 Standard Pipe Adapter, and give you my thoughts and impressions along the way. I may have spoiled the ending with the title and opening paragraph, but I’ll make up for it by recommending a third party alternative pipe adapter.
Overview
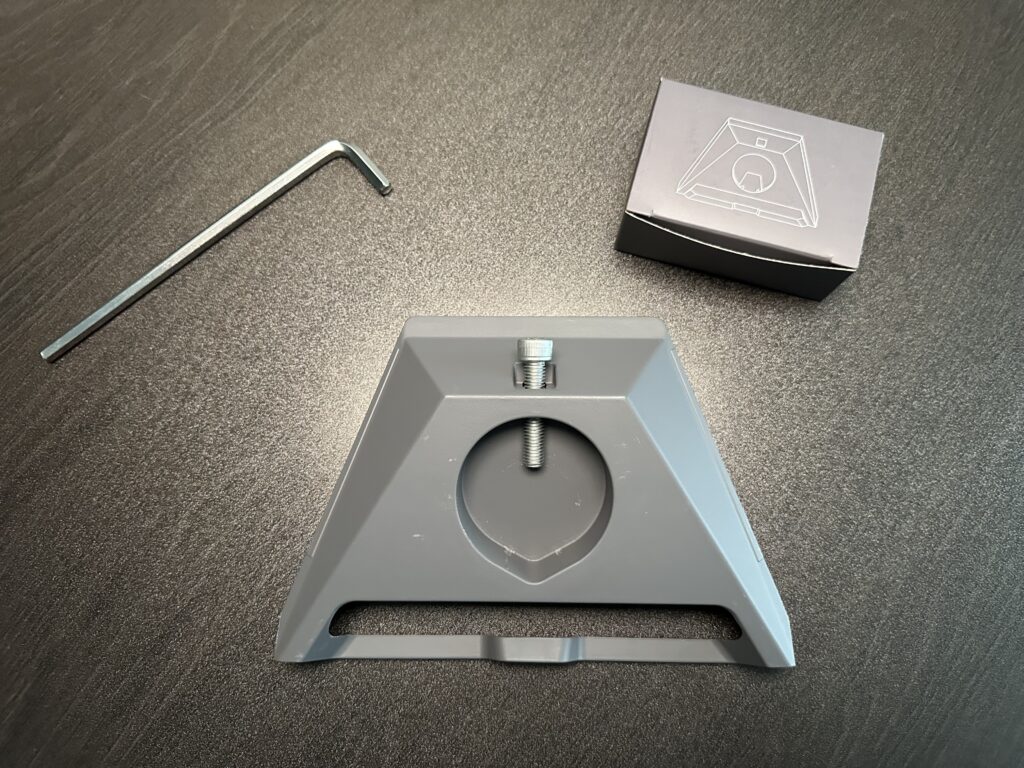
I bought the “Standard Pipe Adapter” from the Starlink shop for $38. This version is compatible with the newest Gen 3 Standard dish, the one with the kickstand and no mast/motors. As the name implies, this mounting accessory allows you to adapt virtually any pipe to the Gen 3 antenna. The Pipe Adapter allows you to use third party mounts with your dish.
The contents of the Pipe Adapter kit are minimal. You get the adapter, along with a wrench and instruction sheet. Starlink also includes some cable management clips. The setup process seemed straightforward, with just a single bolt to tighten after you insert the adapter onto a pipe.
Recall
The first Standard Pipe Adapter I ordered was actually recalled due to a design issue. I received the product, but Starlink sent me an email instructing me to avoid using it. Several weeks later, they sent a free replacement that supposedly fixed the design issue.
I later found out that several early Pipe Adapter’s failed after the single bolt loosened over time. A few people had their brand new Gen 3 dishes fall off the pipe as a result. This forced Starlink to take a closer look at the design, and they changed the material of the bolt so that it wouldn’t loosen over time. That’s the only difference between the recalled version and the current one that I reviewed.
This post may contain affiliate links. See our policy to learn more.
Installation
For the review, I installed the Standard Pipe Adapter onto a Proxicast J-Mount. J-Mount’s are commonly used to mount satellite dishes, and they have proven to be a popular alternative to Starlink’s official mounting accessories.
To install the Standard Pipe Adapter, you start with the Gen 3 dish itself. I had to remove the kickstand mount that comes with the dish. There is a tab on the kickstand that you just pull up on, while also applying horizontal force to slide it off the dish. The Starlink cable connector is revealed, and you can just pull it straight out.
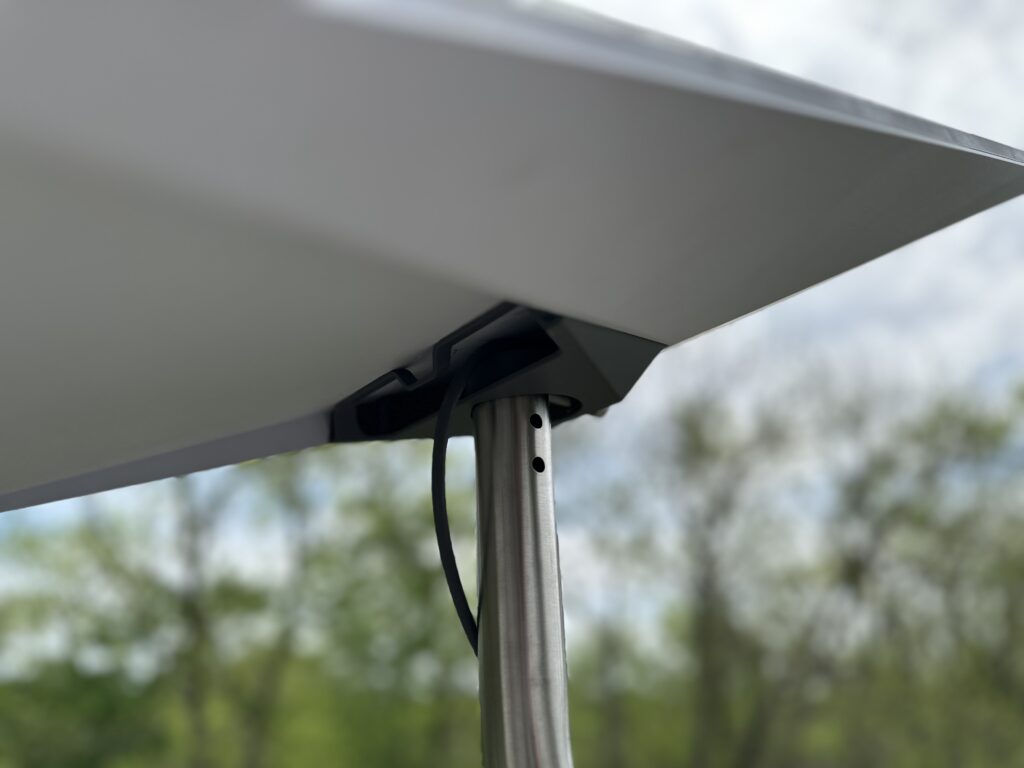
With the kickstand removed, I routed the cable through the Pipe Adapter. There is a channel on the underside of the adapter where the cable is supposed to be routed. Then I plugged the cable back into the dish, making sure the moisture seal was flush with the plastic housing. With the cable connected, the Pipe Adapter can slide in, locking in place when the two tabs engage.
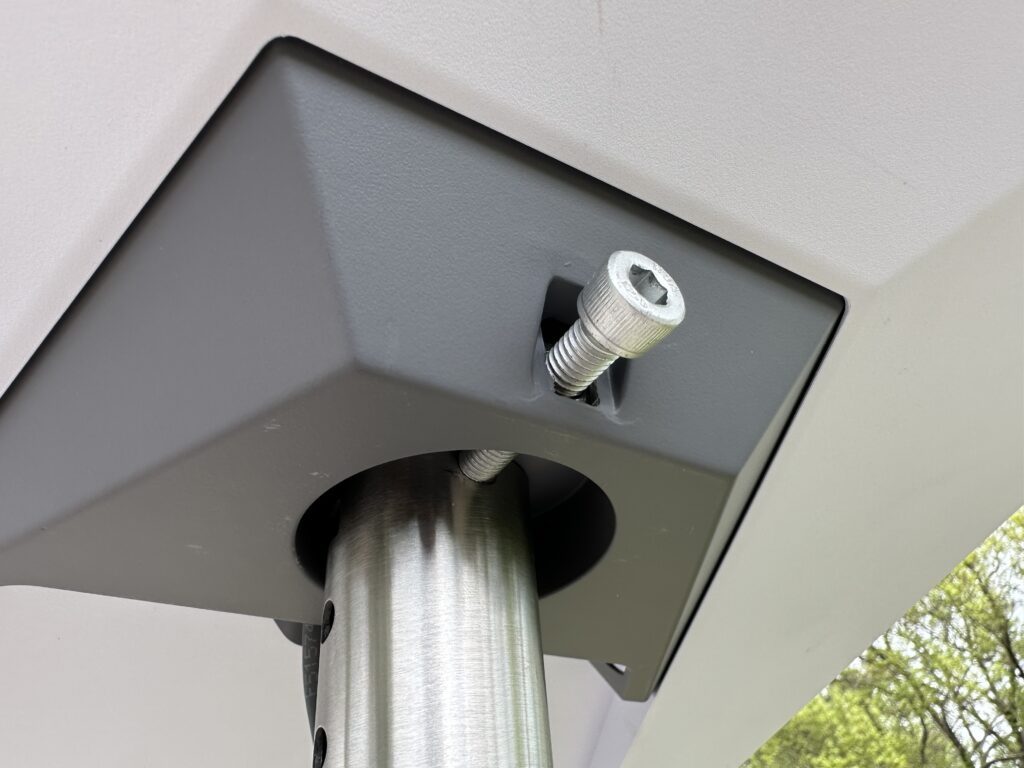
I carried the dish, with the Pipe Adapter in place, to the roof where the J-Mount was already installed. I had to loosen the bolt on the Pipe Adapter a bit so that I could slide it down onto the mount. Once the pipe was inserted fully, I tightened the bolt by hand until it was snug. The Gen 3 dish has to be manually aimed, so I did that before tightening the bolt with the included wrench. If you want to know how to manually aim a Gen 3 dish, check out our tutorial.
With the alignment done, I was able to tighten down the bolt on the Pipe Adapter. It doesn’t take much. The instruction sheet in the kit says to check the dish for any play. It should not rotate or tilt up and down. If it does, you need to tighten the bolt. With everything tightened down to my liking, the installation of the Pipe Adapter was complete. I finished up by routing the cable down the side of the garage, where I already have an entry hole from our cable routing tutorial.
Review
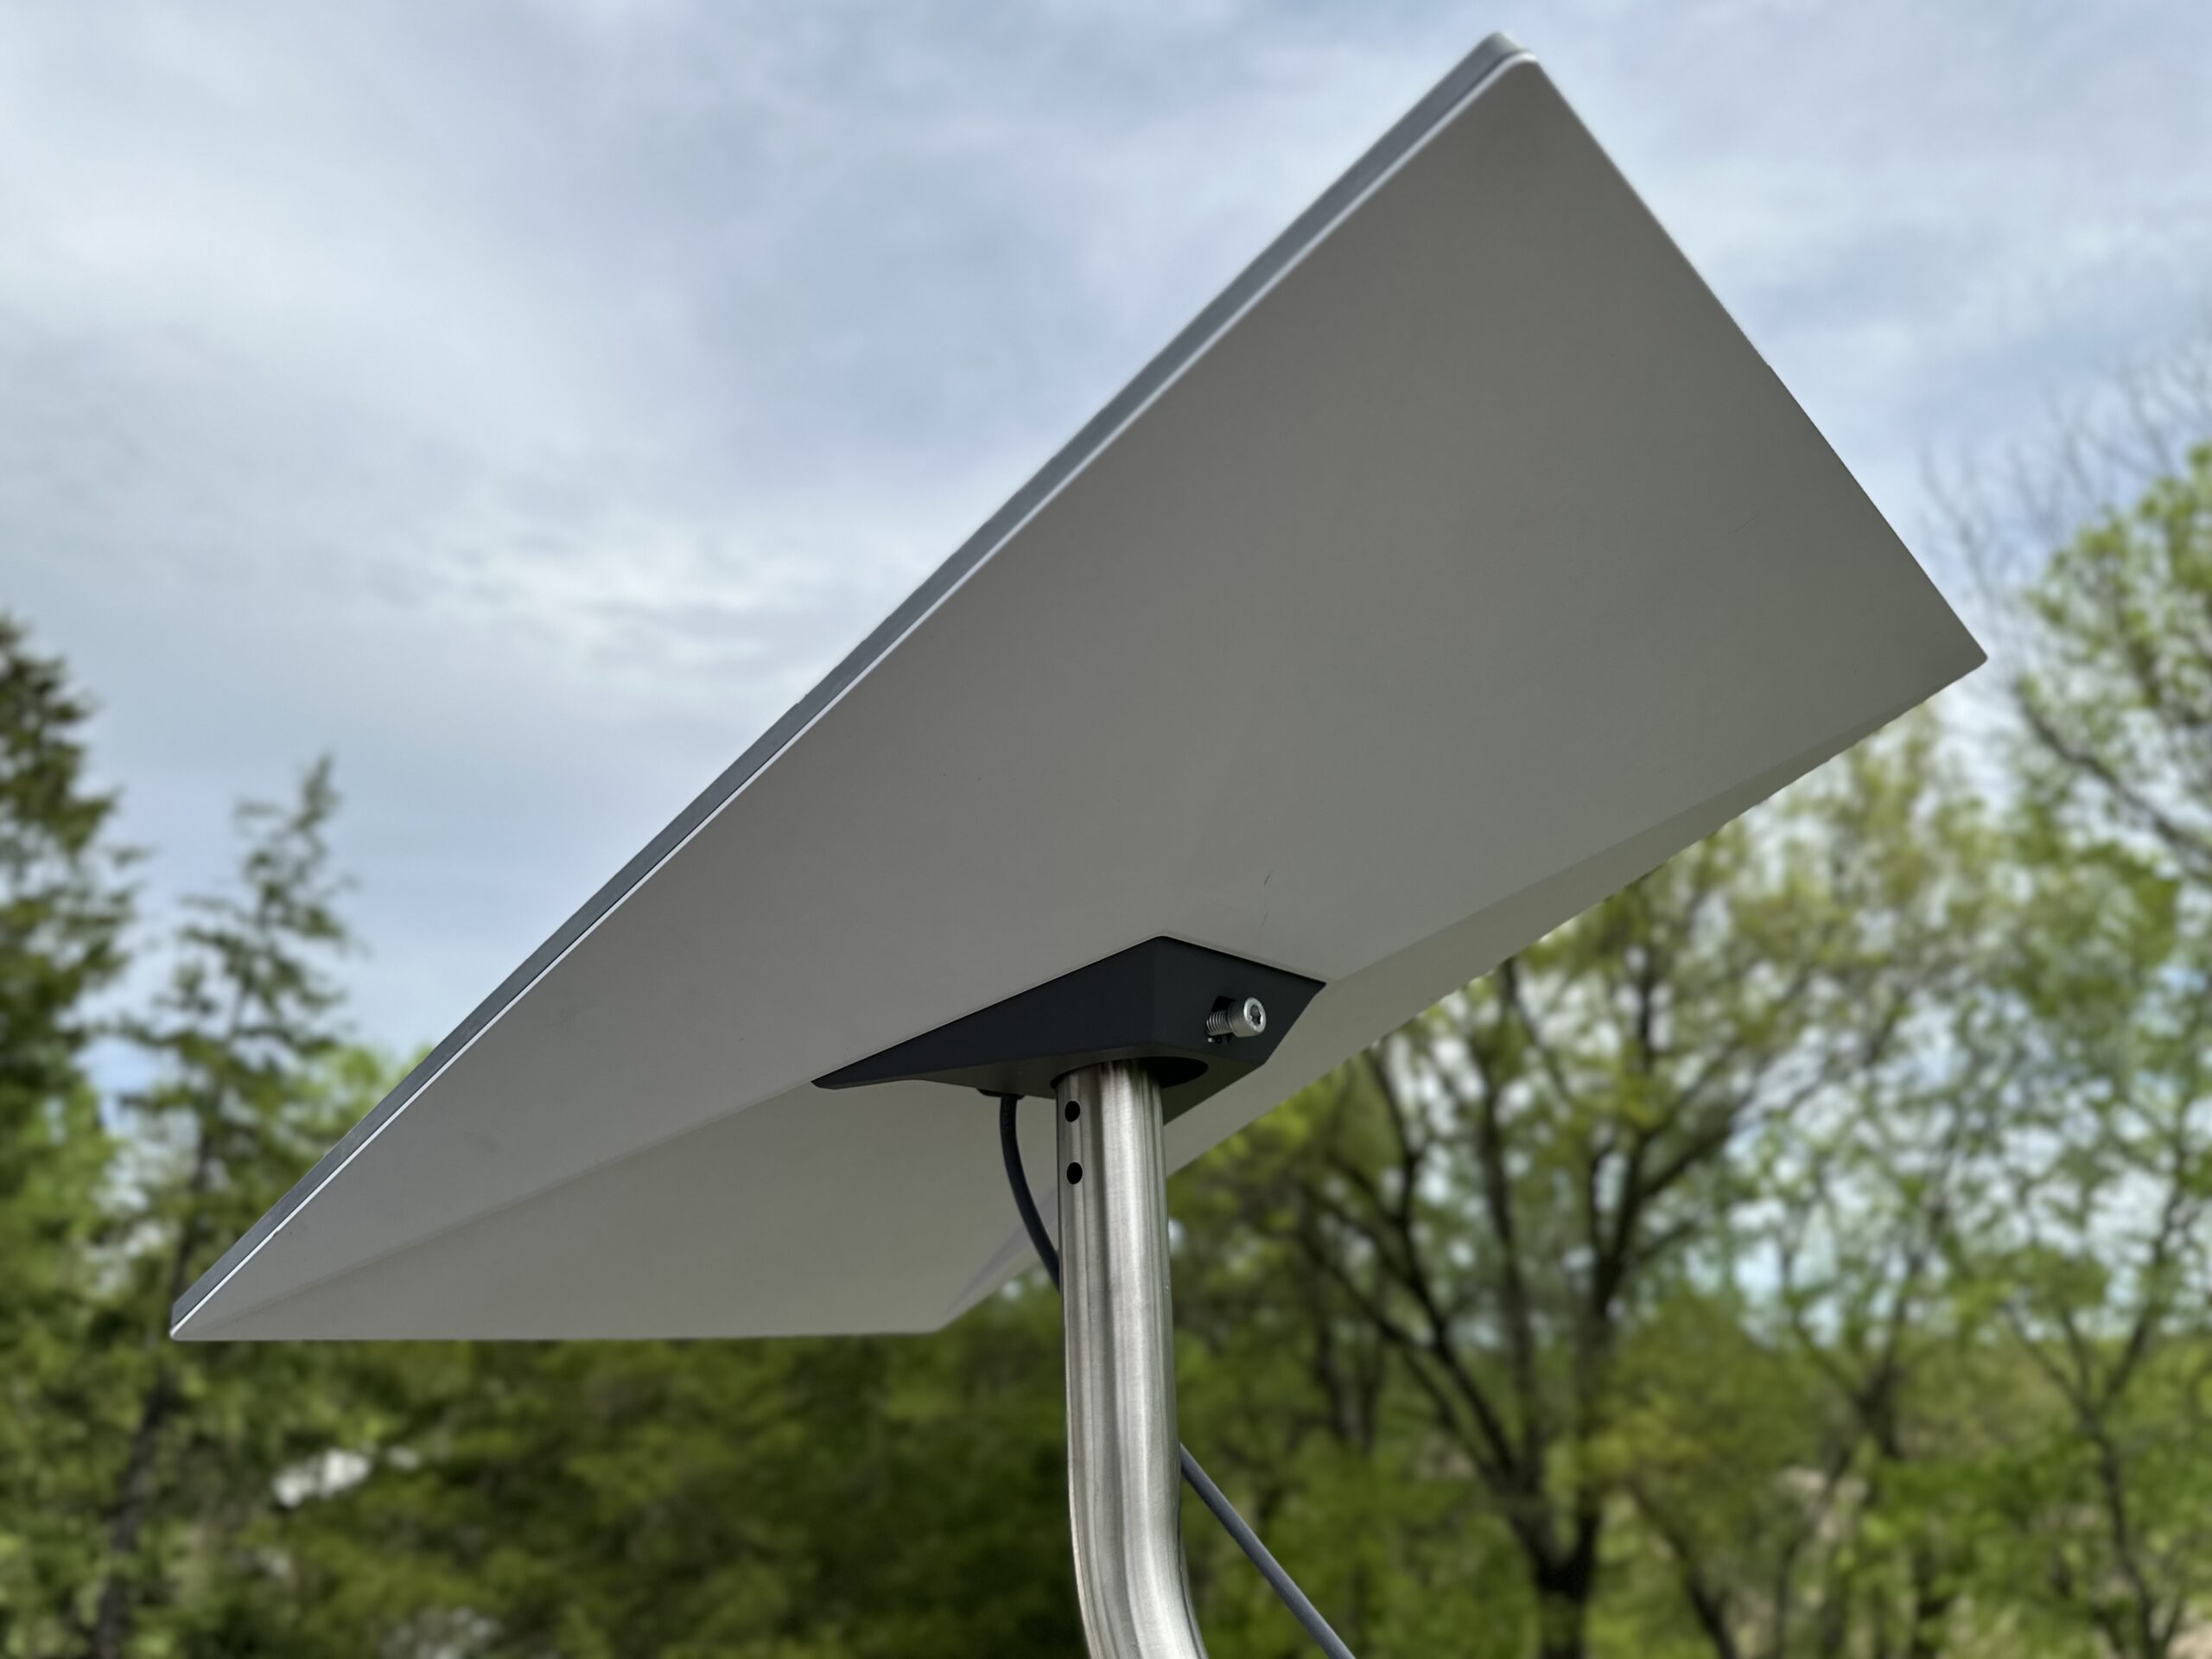
During the installation process I kept thinking the same thing over and over again. The amount of pipe this adapter can accept is not enough. I measured, and it turns out this adapter accepts just 3/4″ of pipe. The bolt on the Pipe Adapter contacts the pipe less than 1/2″ down from the top. Even with the bolt tightened down, I didn’t feel confident that this mount would hold up over time.
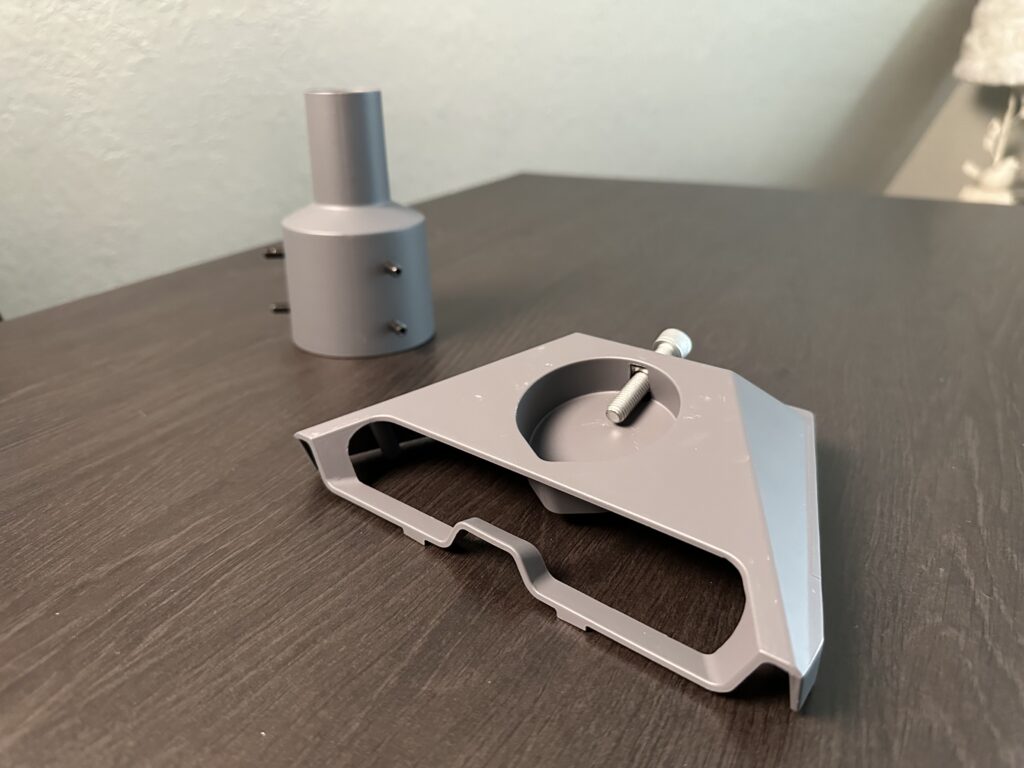
When comparing the older Gen 2 Pipe Adapter to this new version, the problem is obvious. The design of the Gen 3 Pipe Adapter is just bad. The adapter is too shallow, and it relies on a single bolt to hold it to the pipe. The Gen 2 Pipe Adapter accepts about 2.5″ of pipe, and six set screws secure it in place. How did Starlink think it was a good idea to abandon the tried and true design of the Gen 2 version?
The final straw for this review came when I took the Gen 3 Pipe Adapter back off the J-Mount. I noticed a huge problem. Tightening the bolt, which makes contact with the upper edge of the pipe, had bent the pipe in a little bit. Due to the position of the bolt on the pipe, that would allow the bolt and adapter to work upward over time. The design is simply dangerous. I would not feel comfortable with my $600 dish mounted long term with the Pipe Adapter. At least with the previous version, if the set screws somehow failed, the Pipe Adapter wouldn’t fall off the pole. With the Gen 3 version, if the single bolt loosens, there isn’t enough pipe inserted to keep it from toppling off your roof.
Alternative Adapter for Gen 3

#CommissionsEarned
Thankfully, several third party companies are making pipe adapter’s for the Gen 3 Starlink dish. The one I recommend can be found on Amazon. The design is much better than the Starlink adapter. It is much deeper, allowing several inches of pipe to be inserted. There are also multiple set screws so that the adapter stays secured to the mount.
Final thoughts

The recall and the poor design choices make the Standard Pipe Adapter the worst accessory Starlink has ever offered. I can’t recommend it for anyone. There are several alternatives from third party companies that all have a better design. It’s worth spending a bit more money and going with an aftermarket adapter, rather than risking your Gen 3 dish with Starlink’s version.
Check out my Starlink Roof Mount Guide to explore other mounting options.
We have to disagree on this one.
For the Standard (model) dish, the Standard Pipe Adapter works in many situations where other mounts will not.
– nonpenetrating flat rooftop mounts: the heavy duty commercial grade with 6 to 8 cinder blocks or similar, these are used on any flat rooftop, residential or commercial.
– long pole mounts: attached to buildings up the side with brackets extending above the roof, poles on chimneys and/or a long pole buried in the earth, like a tetherball pole & more.
– any pipe 1.5″ to 2.5″ in diameter where other mounts might not work
The weight and quality of the Standard Pipe Adapter is better than anything else we have encountered out there.
Do you know what’s the new material of the bolt?
Do you know what’s the new material of the bolt?
Hello I recently purchased a starlink system but now find that the “standard’ system just has a rectangular dish with a single bar underneath to level the dish. I need to mount mine off-roof so it does not get buried in deep snow that we have her in Northern Idaho. Can you help me? Do I need a different Dish? Also a different mount? Thanks Much******************Kurt 509-540-0077
I assume off-roof means you need some separation from the roof for snow? And not ground mount? If so, check out my Starlink Roof Mount Guide to see the various options for mounting Starlink on a roof. I recommend the Standard Wall Mount.
Thanks for the info. If I install a J-max roof mount, do I need to ground the J-max?
Thanks for the info. If I install a J-max roof mount, do I need to ground the J-max?
I noticed the same flaw when installing on our boat. Way too little overlap on the pole. I drilled two holes opposite the set screw and put in two stainless steel self tapping screws to keep the thing from riding up and off the top of the pole. Hopefully that will be enough.
Bonus tip: drill another hole in the top of the mount and lead cable inside the pole instead of outside. A “duh” moment for Starlink – but not complaining since the service is awesome and so far outperforming our cellular hot-spots.
If you close the top of the tube, drill a hole in the tube, and tighten the screw all the way down?
If you close the top of the tube, drill a hole in the tube, and tighten the screw all the way down?
Do you know if there’s an UK/EU company doing anything like this, thanks
Do you know if there’s an UK/EU company doing anything like this, thanks